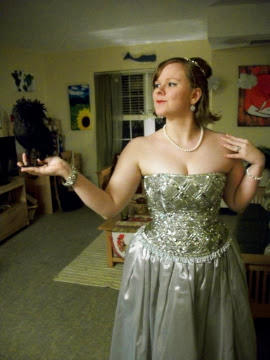
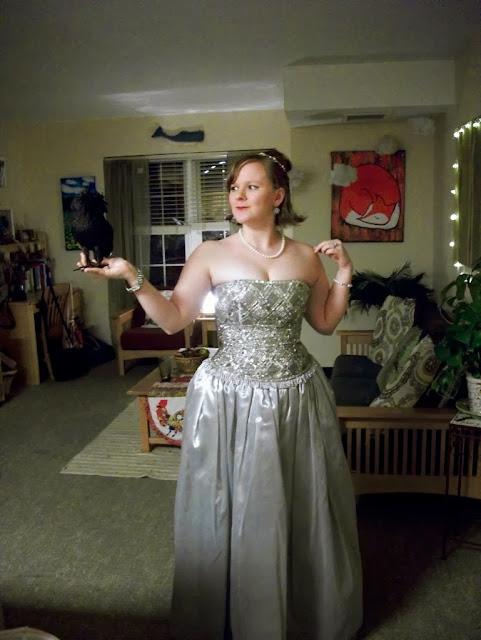
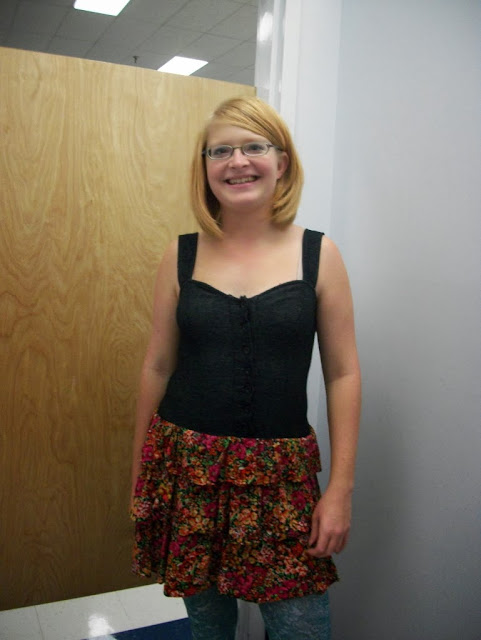
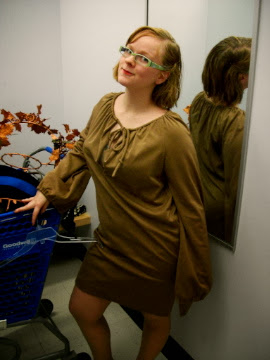
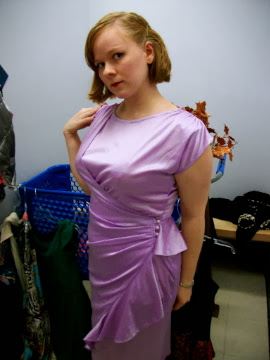
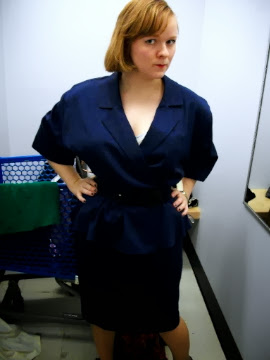
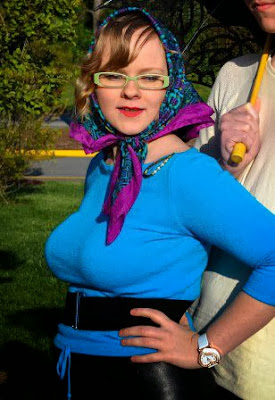
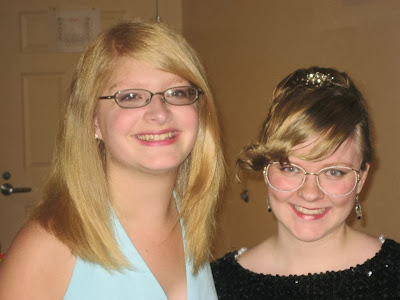
I said I would be a character from Theatre of Blood earlier, but then I remembered I had this dress:
A few weeks ago I wore it to be Queen Elizabeth I for a college event. Today I broke it out again. I put it on, and I went through all the possibilities of who I would be. I remembered this dress by Grace Kelly:
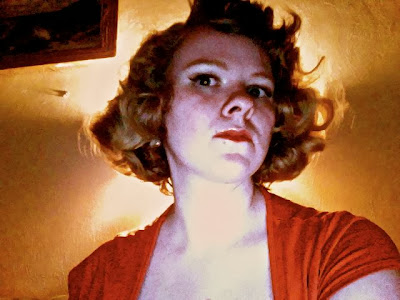
Though her dress has sleeves, and isn't as full, I could see this being a dress she might wear. However, my hair was looking darker than normal today, and I thought of Marilyn:
It did feel quite like this in my dress, thought without the off-the-shoulder sleeves.
I decided this was it. I have darker hair, especially today, but I felt as lovely as ever being Marilyn for Hallowe'en. I told some people I was Cinderella, but, really, I was Marilyn. I curled my hair a little bit, put in a bump, and lots of sparkly jewelry (Diamond's are a girl's best friend!).
Thursday, October 31, 2013
Happy Hallowe'en!
Happy Hallowe'en!
I hope you all have glamourous vintage revels tonight! I am going to be a character from a 70's Vincent Price movie, Theatre of Blood. Tomorrow I am going to be something magnificent, and surprising, then Saturday my college is having a party and I am going to be a 30's Murderess. Pictures to come later.
I strongly suggest settling in with your friends and loved ones with a big bowl of popcorn and mini chocolate bars to watch Agatha Christie's Poirot: Hallowe'en Party. It is eerie, and perfect for a night like this!
Tuesday, October 29, 2013
Vintage Beauty Tips: Face
Yesterday we talked about hair, and today we will talk about facial care. I have a fairly simple routine, and it is as follows:
It smells wonderful, and it cleans your skin. I will say now, you should look around for the best cold cream for you. I have very oily skin, and this one does not leave me feeling greasy (it did the first week or so, but my skin adjusted nicely, and now it is always smooth). This one runs anywhere from 5-8 dollars for a 10oz jar.
I use it every day but once or twice a week. I use only dab a small amount on my fingers and rub it in to the skin all over my face. Lastly, I moisten a washcloth with warm to hot water (not too hot), rub it on my face to remove the cleanser, rinsing the cloth as necessary.
This cleanser will remove all makeup, even eye makeup. However, I cleanse my face and then the eyes. It does not sting the eyes, as long as you use just a dab on each eye lid. The cleanser will sometimes smudge the makeup so badly it will make you look like a raccoon. That is why I do it second, so I don't smudge eyeliner all over my face.
It will leave your skin feeling smooth and fresh and clean.
A Buf-Puf is a tear shaped sponge that is slightly rough:
They are not easy to find, so when I see them at the drug store I stock up. You can get them in gentle and normal, in case you have sensitive skin. They normally cost about 5 dollars for a pack of two.
To use it, I use a bit of ivory bar soap, a classic. I exfoliate my face for about a minute with the sponge. I rinse my face with very warm water. Doing this once a week cleans the excess skin on my face, leaving a fresh face for the next day.
That is my routine. Cold cream and buf-puf. The buf-puf has been around for a long time, and so has ponds. I feel using these classic items helps embody the vintage lifestyle even more.
Step 1:
The classic face wash for vintage lovers is cold cream. Ponds is the king of cold creams. I experimented with different ones, and Ponds Cucumber Cleanser works best for me:It smells wonderful, and it cleans your skin. I will say now, you should look around for the best cold cream for you. I have very oily skin, and this one does not leave me feeling greasy (it did the first week or so, but my skin adjusted nicely, and now it is always smooth). This one runs anywhere from 5-8 dollars for a 10oz jar.
I use it every day but once or twice a week. I use only dab a small amount on my fingers and rub it in to the skin all over my face. Lastly, I moisten a washcloth with warm to hot water (not too hot), rub it on my face to remove the cleanser, rinsing the cloth as necessary.
This cleanser will remove all makeup, even eye makeup. However, I cleanse my face and then the eyes. It does not sting the eyes, as long as you use just a dab on each eye lid. The cleanser will sometimes smudge the makeup so badly it will make you look like a raccoon. That is why I do it second, so I don't smudge eyeliner all over my face.
It will leave your skin feeling smooth and fresh and clean.
Step 2:
I use the cold cream every night but once or twice a week, like I said before. The other nights I use a Buf-Puf, or exfoliating sponge.A Buf-Puf is a tear shaped sponge that is slightly rough:
They are not easy to find, so when I see them at the drug store I stock up. You can get them in gentle and normal, in case you have sensitive skin. They normally cost about 5 dollars for a pack of two.
To use it, I use a bit of ivory bar soap, a classic. I exfoliate my face for about a minute with the sponge. I rinse my face with very warm water. Doing this once a week cleans the excess skin on my face, leaving a fresh face for the next day.
That is my routine. Cold cream and buf-puf. The buf-puf has been around for a long time, and so has ponds. I feel using these classic items helps embody the vintage lifestyle even more.
Monday, October 28, 2013
Vintage Beauty Tips
UPDATED:
Today is a two post day. The recipe, and this, beauty tips.
To be a true vintage vixen, you need to know what the typical beauty routine was. Women always looked perfect, from hair to nails. There are two aspects that I am going to cover today and tomorrow: Hair and face. Let's start with the hair.
When they washed their hair they used a three step process: Shampoo, first rinse with vinegar and water, and final rinse.
The shampoo was never great quality, and it stripped the hair of all of the dirt, because washing was so infrequent. I use Suave typically, because that is most like what they had back in the 50's.
The vinegar was mixed with water (a few drops of vinegar to a cup of water) and used to rinse out excess oil. It works wonders, and you would not think so. Also, it doesn't make your hair smell strange, like I thought it would.
Lastly, you rinse out your hair with plain water, cold if you can stand it. This will make sure you have gotten all of the residue from the shampoo and vinegar out of your hair.
I use conditioner, even though it was not commonly used then. I like my hair super soft.
Alright, you hair is clean. So, now it is wet, you should set it in curlers. Curls last longest when they dry in curlers. I use sponge curlers, but you could use pin-curls, or:
Tape, oh dear.
For a more Marylin Monroe type style (my go to look), I do the largest curlers at the crown of my head. Around my face and nape of my neck, I use small curlers, and for the rest of my hair I use medium curlers.
The set I use is the 48 pack by Conair:
Since my hair is short, I use the green curlers in the pack as the largest curler, yellow as medium, and blue as small. When I had longer hair I used pink as large, green as medium, and yellow as small, using the blue ones only when I had a few baby hairs, or if I ran out of yellow.
I normally wash my hair at night, so I put the curlers in to sleep. But, sometimes, I curl my hair in the morning, and that is when I use one of these bad boys:
My grandmother gave it to my family recently, and it is so much fun to use. Ours has settings for wigs (real and synthetic). I put the dryer on the highest setting for 30 minutes, the next highest setting for 20, and the cool setting for 15. The heat can help maintain the curl for longer.
When the curlers have cooled and dried completely take them out. Use a bristle brush to smooth out the curls to look the way you want them. Mist with hairspray, and done!
A hair set will last about 2-3 days for me, when I brush it out lightly before bed and when I wake up. After that, I sleep in curlers again with dry hair.
Today is a two post day. The recipe, and this, beauty tips.
To be a true vintage vixen, you need to know what the typical beauty routine was. Women always looked perfect, from hair to nails. There are two aspects that I am going to cover today and tomorrow: Hair and face. Let's start with the hair.
Vintage Hair Tips:
Back in the day, of the 40's, 50's, and 60's, women washed their hair only once every week, or even two weeks. They washed their hair when it looked dirty, and since it was curled or pinned up most days, hair looked clean longer.When they washed their hair they used a three step process: Shampoo, first rinse with vinegar and water, and final rinse.
The shampoo was never great quality, and it stripped the hair of all of the dirt, because washing was so infrequent. I use Suave typically, because that is most like what they had back in the 50's.
The vinegar was mixed with water (a few drops of vinegar to a cup of water) and used to rinse out excess oil. It works wonders, and you would not think so. Also, it doesn't make your hair smell strange, like I thought it would.
Lastly, you rinse out your hair with plain water, cold if you can stand it. This will make sure you have gotten all of the residue from the shampoo and vinegar out of your hair.
I use conditioner, even though it was not commonly used then. I like my hair super soft.
Alright, you hair is clean. So, now it is wet, you should set it in curlers. Curls last longest when they dry in curlers. I use sponge curlers, but you could use pin-curls, or:
Tape, oh dear.
For a more Marylin Monroe type style (my go to look), I do the largest curlers at the crown of my head. Around my face and nape of my neck, I use small curlers, and for the rest of my hair I use medium curlers.
The set I use is the 48 pack by Conair:
Since my hair is short, I use the green curlers in the pack as the largest curler, yellow as medium, and blue as small. When I had longer hair I used pink as large, green as medium, and yellow as small, using the blue ones only when I had a few baby hairs, or if I ran out of yellow.
I normally wash my hair at night, so I put the curlers in to sleep. But, sometimes, I curl my hair in the morning, and that is when I use one of these bad boys:
My grandmother gave it to my family recently, and it is so much fun to use. Ours has settings for wigs (real and synthetic). I put the dryer on the highest setting for 30 minutes, the next highest setting for 20, and the cool setting for 15. The heat can help maintain the curl for longer.
When the curlers have cooled and dried completely take them out. Use a bristle brush to smooth out the curls to look the way you want them. Mist with hairspray, and done!
A hair set will last about 2-3 days for me, when I brush it out lightly before bed and when I wake up. After that, I sleep in curlers again with dry hair.
Holiday Hostess: Hallowe'en Breakfast
Around most holidays I am going to do a post or two about holiday baking/cooking for a party. Today, I am going to give you all a recipe for a delicious hallowe'en, or just autumn, treat.
Every year around Hallowe'en I start my fall baking binge. Last year, I tried to make cinnamon rolls, for the first time. That did not go over well. I tried a few more times, and finally mastered the recipe. I make them about once a month now, and for Hallowe'en I added a little secret ingredient: Pumpkin
3 tbsp sugar
1 packet yeast (2.5 tsp)
1/2 tsp salt
1 1/2 tsp baking powder
1 tsp cinnamon
1 cup milk
1/2 cup flavorless oil
2 eggs
Whisk all of the dry ingredients together in a large bowl.
Heat the milk and oil until warm.
Combine with dry ingredients and mix for 2 minutes.
Add the eggs one at a time, beating 30 seconds after each addition.
2 1/2-3 cups flour
Add oats and mix
Add flour until the dough is no longer sticky.
Knead for 5 minutes.
Shape into a ball, and coat in oil.
Cover and let rise until doubled (20-45 minutes, depending on temperature)
2/3 cup brown sugar
3 tbsp cinnamon
1/4 tsp ginger
1/4 tsp nutmeg
1/3 cup flour
2 tbsp pumpkin puree
While the dough is rising cream butter and sugar.
Mix flour and spices.
Stir in pumpkin.
This should make a spread.
Roll to about the size of a cookie sheet.
It will probably be about 1/2 inch thick.
Spread filling onto dough, being sure to go all the way to the edges.
Leave one edge clean about 1/2 inch, to seal the dough once rolled.
Once filled, roll the dough into a log.
Slice dough into equal parts (mine usually yields 9 or 10, but I make them pretty big).
Tip, you can chill the dough slightly before slicing to make it easier to cut.
Arrange the cinnamon rolls on a cookie sheet in a group.
Allow to rise until doubled.
Chill for several hours, or overnight.
Take the rolls out of the fridge and let get to room temperature during preheating.
Bake for 30-35 minutes, until golden on top.
1/3 cup brown sugar
1/4 cup white sugar
1/3 cup heavy cream
1-2 tbsp butter
Dash of cinnamon, nutmeg, and ginger.
1 tbsp of pumpkin puree.
Whisk together all of the ingredients except the pumpkin and butter.
Heat until boiling. Do not whisk at this point.
Let cook for about 5 minutes, until it has the color of caramel (put a drop on a white dish).
Take off heat.
Add butter, it may pop and sizzle a little.
Stir in pumpkin.
Once the cinnamon rolls come out of the oven, immediately pour the caramel over them.
Voila! You are done. It is not easy the first try, but with practice, you can have the most yummy cinnamon rolls for fall! I normally make them at night, and chill them for breakfast the next morning. I use oats in my recipe, because it keeps the final product from getting stale.
Once I make these, I put on a pot of hazelnut coffee, and invite over all my friends for breakfast. It is thoroughly enjoyable, not to mention delicious.
Enjoy!
Every year around Hallowe'en I start my fall baking binge. Last year, I tried to make cinnamon rolls, for the first time. That did not go over well. I tried a few more times, and finally mastered the recipe. I make them about once a month now, and for Hallowe'en I added a little secret ingredient: Pumpkin
Pumpkin Spice Cinnamon Rolls:
I am going to break this down the way that I bake it, because I always had trouble when the ingredients list would say 3 cups flour, and then the first step would say "mix flour, 1 cup". I would always miss the "1 cup" and put everything in the bowl at once. I am breaking down the recipe block by block, to avoid that sort of confusion.To prep the dough:
Ingredients:
1 1/2 cups flour3 tbsp sugar
1 packet yeast (2.5 tsp)
1/2 tsp salt
1 1/2 tsp baking powder
1 tsp cinnamon
1 cup milk
1/2 cup flavorless oil
2 eggs
Whisk all of the dry ingredients together in a large bowl.
Heat the milk and oil until warm.
Combine with dry ingredients and mix for 2 minutes.
Add the eggs one at a time, beating 30 seconds after each addition.
To finish the dough:
Ingredients:
1 cup oatmeal, or oats2 1/2-3 cups flour
Add oats and mix
Add flour until the dough is no longer sticky.
Knead for 5 minutes.
Shape into a ball, and coat in oil.
Cover and let rise until doubled (20-45 minutes, depending on temperature)
The filling:
Ingredients:
1/2 cup, 1 stick, butter room temperature2/3 cup brown sugar
3 tbsp cinnamon
1/4 tsp ginger
1/4 tsp nutmeg
1/3 cup flour
2 tbsp pumpkin puree
While the dough is rising cream butter and sugar.
Mix flour and spices.
Stir in pumpkin.
This should make a spread.
To assemble:
Once dough has risen, put on flat, floured surface.Roll to about the size of a cookie sheet.
It will probably be about 1/2 inch thick.
Spread filling onto dough, being sure to go all the way to the edges.
Leave one edge clean about 1/2 inch, to seal the dough once rolled.
Once filled, roll the dough into a log.
Slice dough into equal parts (mine usually yields 9 or 10, but I make them pretty big).
Tip, you can chill the dough slightly before slicing to make it easier to cut.
Arrange the cinnamon rolls on a cookie sheet in a group.
Allow to rise until doubled.
Chill for several hours, or overnight.
To finish:
Preheat oven to 375.Take the rolls out of the fridge and let get to room temperature during preheating.
Bake for 30-35 minutes, until golden on top.
Frosting/topping ingredients:
I always top with a caramel sauce, so here goes:1/3 cup brown sugar
1/4 cup white sugar
1/3 cup heavy cream
1-2 tbsp butter
Dash of cinnamon, nutmeg, and ginger.
1 tbsp of pumpkin puree.
Whisk together all of the ingredients except the pumpkin and butter.
Heat until boiling. Do not whisk at this point.
Let cook for about 5 minutes, until it has the color of caramel (put a drop on a white dish).
Take off heat.
Add butter, it may pop and sizzle a little.
Stir in pumpkin.
Once the cinnamon rolls come out of the oven, immediately pour the caramel over them.
Voila! You are done. It is not easy the first try, but with practice, you can have the most yummy cinnamon rolls for fall! I normally make them at night, and chill them for breakfast the next morning. I use oats in my recipe, because it keeps the final product from getting stale.
Once I make these, I put on a pot of hazelnut coffee, and invite over all my friends for breakfast. It is thoroughly enjoyable, not to mention delicious.
Enjoy!
Sunday, October 27, 2013
Hallowe'en Costume: 1930's Murderer/Murderess
This will be my last costume post. I write Murder Mystery Parties several times a year, and loosely base most of the plots on Agatha Christie novels. Everyone gets in costume, I typically set the parties between 1925 and 1968, and the festivities begin over dinner.
In this post I will explain how to dress as the murderer from these parties (though the murderer aspects are just a little accessories, since the murderer wants to be as discreet as possible for as long as possible). This is the easiest costume to assemble.
Note the longer jacket, and wide leg trousers.
If you are a woman, you will need to wear a 30's style cocktail/evening dress:
Note the 3/4 length dress. You will also want to wear lots of pearls, and possibly a fur stole.
First, you will probably want to master the awful cockney accent that all murderers have in Agatha Christie movies.
Next, you will want to carry a weapon. A plastic, costume knife with red paint, a pipe, noose, or any other weapon that is not actually a weapon. You do not want to be really dangerous on hallowe'en. If you are a man, try to keep it hidden in your coat pocket, or up your sleeve. If you are a woman, try to make it small enough to fit in an evening bag. That way, you can take it out dramatically when people as you what you are dressed as.
And that is that. You are a 1930's Murderer/Murderess! It is very simple, and fun. I may be this on hallowe'en, or at my party the next day, I have yet to decide.
In this post I will explain how to dress as the murderer from these parties (though the murderer aspects are just a little accessories, since the murderer wants to be as discreet as possible for as long as possible). This is the easiest costume to assemble.
Step 1:
The first thing you need is to, if you are man, find a suit:Note the longer jacket, and wide leg trousers.
If you are a woman, you will need to wear a 30's style cocktail/evening dress:
Note the 3/4 length dress. You will also want to wear lots of pearls, and possibly a fur stole.
Step 2:
Alright, now you have your basic costume, all you need are the accessories to transform you into a murderer.First, you will probably want to master the awful cockney accent that all murderers have in Agatha Christie movies.
Next, you will want to carry a weapon. A plastic, costume knife with red paint, a pipe, noose, or any other weapon that is not actually a weapon. You do not want to be really dangerous on hallowe'en. If you are a man, try to keep it hidden in your coat pocket, or up your sleeve. If you are a woman, try to make it small enough to fit in an evening bag. That way, you can take it out dramatically when people as you what you are dressed as.
And that is that. You are a 1930's Murderer/Murderess! It is very simple, and fun. I may be this on hallowe'en, or at my party the next day, I have yet to decide.
Saturday, October 26, 2013
Thrifting and Baking
Yesterday I woke up, did some work, and wrote invitations for my party next Friday, making sure to be finished by the time I had to go into work. Then my boss called, and told me that I did not need to come in. Thrilled, I decided to go to a thrift store with my roommate.
When we got there we decided to pick out one ugly item for the other to try on. Here is what we came up with:
After we each tried on unfortunate choices, we tried on the lovely things we picked out:
We didn't get either of these, but they don't look too bad. I love the way the tan dress I'm wearing is so seventies. I knew that I wouldn't really wear it, but it is chic.
Then I tried on two more dresses. The first one looks ultra-lovely, but alas, there was a lot of damage, and the material was similar to my peignoir set, so completely unpractical. But, goodness, I love the way this dress looked on me! That second one reminds me a little of JB Fletcher, from Murder She Wrote, but it cinched my waist very well, and the skirt was form fitting. Also, it was dead stock (it had tags!) from the 80's. It was somewhat 80's does 50's so I decided to go for it, and I brought this home with me. We couldn't find anything else we liked, so we headed home.
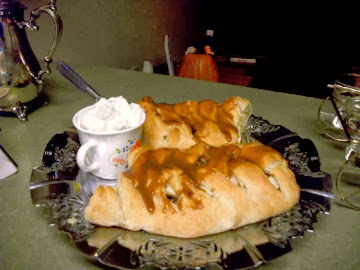
When we got home I felt the urge to bake. I made an apple pastry braid. I have a recipe for a braid pastry, and I fill it differently every time. This time, I sliced two granny smith apples paper thin, then sprinkled them with cinnamon, ginger, and nutmeg. I made a spiced caramel sauce and a spiced whipped cream for garnish. It was oh, so delightful!
Once it came out of the oven, and was topped and put on a serving tray, I changed into a dress to have people over:
I got this when I was in Greenville on my vacation. It is the perfect Chinese dress for me. My roommate and I got dressed, and asked people to stop by. Unfortunately only one person came, but we had good conversation, and delicious food.
All in all, it was a successful day off.
When we got there we decided to pick out one ugly item for the other to try on. Here is what we came up with:
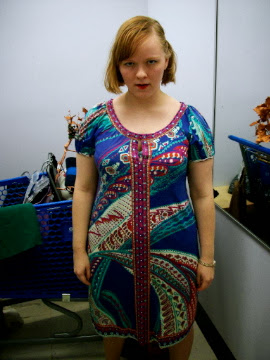
She chose for me a shapeless shift with a pattern that does nothing good for anyone.
I found a sweatshirt dress with shimmery autumn leaves for her. I think we both did a pretty good job.After we each tried on unfortunate choices, we tried on the lovely things we picked out:
We didn't get either of these, but they don't look too bad. I love the way the tan dress I'm wearing is so seventies. I knew that I wouldn't really wear it, but it is chic.
Then I tried on two more dresses. The first one looks ultra-lovely, but alas, there was a lot of damage, and the material was similar to my peignoir set, so completely unpractical. But, goodness, I love the way this dress looked on me! That second one reminds me a little of JB Fletcher, from Murder She Wrote, but it cinched my waist very well, and the skirt was form fitting. Also, it was dead stock (it had tags!) from the 80's. It was somewhat 80's does 50's so I decided to go for it, and I brought this home with me. We couldn't find anything else we liked, so we headed home.
When we got home I felt the urge to bake. I made an apple pastry braid. I have a recipe for a braid pastry, and I fill it differently every time. This time, I sliced two granny smith apples paper thin, then sprinkled them with cinnamon, ginger, and nutmeg. I made a spiced caramel sauce and a spiced whipped cream for garnish. It was oh, so delightful!
Once it came out of the oven, and was topped and put on a serving tray, I changed into a dress to have people over:
I got this when I was in Greenville on my vacation. It is the perfect Chinese dress for me. My roommate and I got dressed, and asked people to stop by. Unfortunately only one person came, but we had good conversation, and delicious food.
All in all, it was a successful day off.
Friday, October 25, 2013
Vingage Necessities: Accessories, Scarves
I have just updated the Betty Draper makeup part of the costume post with pictures, and added pictures under the Hallowe'en party post.
I am going to go back to vintage necessities for today, and discuss one of the most important accessories for vintage wear: the scarf. Scarves have many different shapes and sizes. When I think vintage I think silk scarves. Silk scarves can be square or oblong:
Scarves were worn for more than just keeping warm. They were tied over a woman's hair so that it would stay intact on a windy day, or with the car windows rolled down. You fold the square scarf into a triangle and tie it under your chin. For an oblong scarf, you wrap it around your neck and tie in the back. I wear scarves most days, and always try to pick up one or two when I go vintage shopping.
In the first picture I am wearing an oblong scarf, and the second a square one. Sometimes I wear them as a bandana, headband, or, if the are big enough, as a wrap for a cool evening stroll.
I am going to go back to vintage necessities for today, and discuss one of the most important accessories for vintage wear: the scarf. Scarves have many different shapes and sizes. When I think vintage I think silk scarves. Silk scarves can be square or oblong:
In the first picture I am wearing an oblong scarf, and the second a square one. Sometimes I wear them as a bandana, headband, or, if the are big enough, as a wrap for a cool evening stroll.
Wednesday, October 23, 2013
Vintage Hallowe'en Party!
It is time to party! Well, almost. You now have a couple costume ideas: Betty and Monkee. Today I am going to discuss a little hallowe'en party ideas, vintage style.
I am in love with Agatha Christie, I write 3 Murder Mystery Parties (or so) a year and so, I try to avoid these on hallowe'en because that is a bit stereotypical. This year, my roommate and I are hosting a traveling hallowe'en party (between the our room, a room down the hall, and the room across the hall). Each room has a different station: Food, games, and movie.
For decorations we have a couple pumpkins, witch and bat window decals, and paper chains. (Once we get them all up for the party I will post pictures!) Our decals are vintage style with a craggy witch silhouette over a moon. Paper chains are simple, cheap, and easy to assemble. They provide a complete look to a room, and the homemade feel can be very vintage.
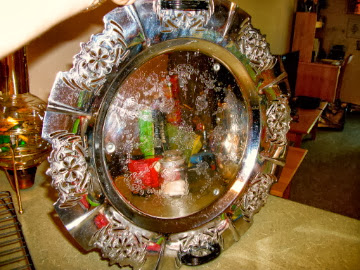
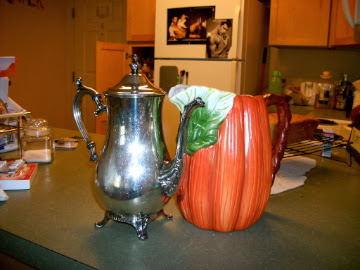
I am a baker, so our room is the food room. For food I am making pumpkin cupcakes, apple cinnamon muffins, a special nacho dip, hallowe'en punch, candy, and a variety of hot drinks. Over the past year I have acquired many, many hostess dishes. I bought a silver serving tray with handles:
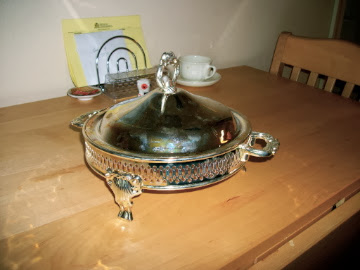
a silver casserole dish with a lid (I use it for cookies):
a pumpkin pitcher, a silver tea pot:
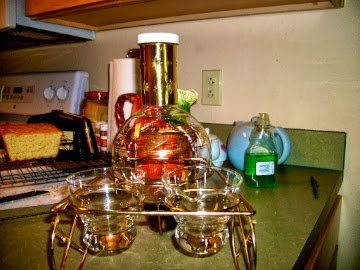
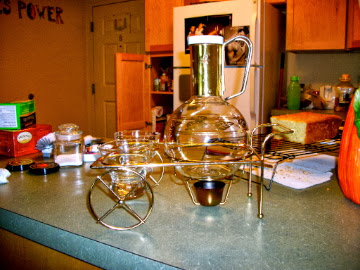
a coffee cart:
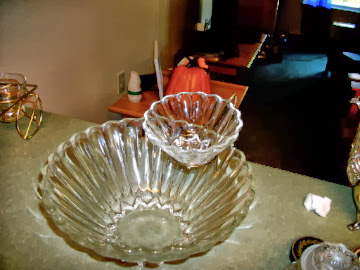
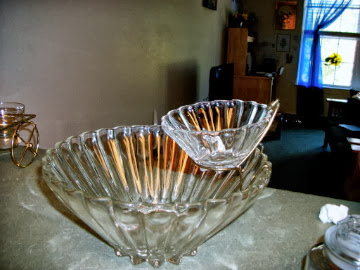
and, the piece de resistance, my dream hostess item: a chip and dip. It is beautiful. It is transparent, ruffled, and, just, so perfect!
For invitations we found these vintage inspired ones. I am going to write some creepy poem, which is something that people used to do! The Vintage Halloween website has a great page with ideas.
Updated with pictures!
Tuesday, October 22, 2013
Hallowe'en Costumes: Betty Draper
Today I do my second Hallowe'en costume idea. Tomorrow I am going to take a break from costumes and discuss hosting a vintage Hallowe'en party!
Our costume for today is an easy one, well, less complicated than the Monkees, but probably more pieces to get together. Betty Draper/Francis dresses as the iconic 50's housewife with a bit of edge. I will discuss how to get the Betty Draper in Rome and Betty Draper at home costumes.
Betty at Home:
This look is pretty easy to achieve. You need a shirt dress with a circle skirt. Here is a pattern from Etsy, it costs 14.50. You can find some already made dresses on Etsy as well. You can try thrifting or do what I did and ask your grandmother!Underneath this dress you need a crinoline. The crinoline will make the skirt full, giving that distinct Betty look. You should wear stockings too, but these are not necessary for a Hallowe'en costume.
Next, you need a strand of pearls, simple stud earrings, and a classic sliver watch (remember when Don tried to bribe her to stay out of therapy?) For shoes pick a pair of simple kitten heels that match.
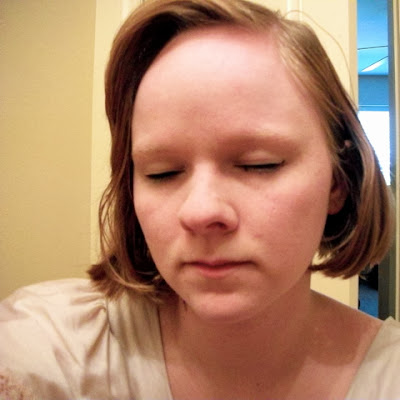
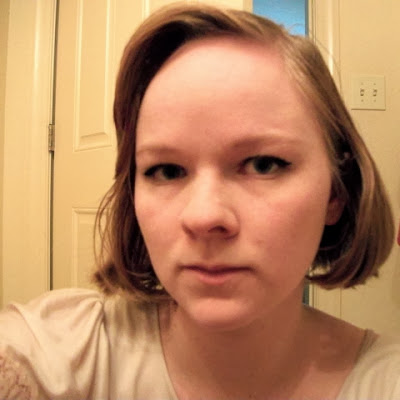
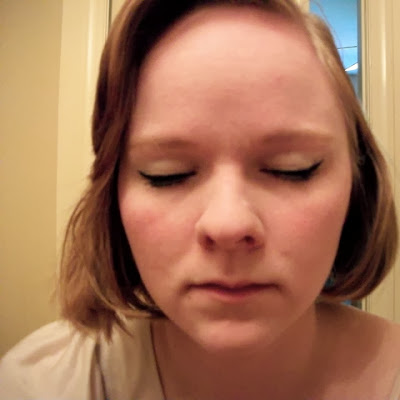
Alright, now that you have gotten your costume together, it is time for hair and makeup. She always sports the cat-eye makeup. For this is pretty simple:
Step 1: Cover your face in powder, eyelids and all.
Step 2: Paint on liquid eyeliner across the lash line and give it a little flick on the outer edge, and let dry.
Step 3: Put on mascara on the top lashes only, making it heavier on the outer edges.
Step 4: Use a pale eyeshadow, champagne, pale pink, or white will do.
Step 5: Lastly, put on pink blush on your cheekbones, concentrating at the apples of your cheeks.
Voila! Betty Draper makeup!
For hair, she typically wore it down with a little curl. I can get a look similar by parting my hair to the side, and using a curling iron to curl in all of the ends of my hair. On the right side (the longer side of the part, that could be different on you) I use the curling iron to make a curl that will frame the face.
After this, you have your Betty Draper costume!
Betty in Rome:
Everyone remembers Betty's Rome costume:Last year I went to the opera and I channeled this costume! For this let's start with hair and makeup.
Her beehive is to die for in this episode, however, it is pretty difficult to achieve. I found this hair tutorial on the Glamorous Housewife blog that gives a classic Betty updo:
This is not too hard. I edit these directions by either using a bump-it to make the beehive taller, or tease it extra to make it as big as you can. Next, I take a brooch and pin it in the middle of the hive in the front:
(That is my roommate with me in blue) It is hard to see in this picture, but I did make my hair very tall that night. Also, I have bangs, so I curled them in and on the end I added a little extra curl.
For makeup I would start with the makeup steps I listed earlier. I would add:
Lengthen the wings a little longer, and line the outer edge on your lower lash line.
Dark eyeshadow across the lid extending to the tips of the wings.
Use a lighter eyeshadow (in the same color) across the top, leaving a little room between the eyebrow and the shadow.
Use white or pale gold shadow just under the brow and in the tear ducts.
Put on a neutral lipstick.
For the dress you need a knee length black dress. I have a dress that is black sequins on the top half, velvet on the bottom, and bead fringe between. Something like this, on Etsy:
She pairs this with black stockings; a long bead necklace with pearls, black beads, and gold beads; long earrings with gold beads at the bottom; and black heels (strappy sandals, stilettos, etc).
I am hoping to be able to make a picture tutorial for the makeup and hair for her at home wear tomorrow.
Monday, October 21, 2013
Hallowe'en Costumes: The Monkees
Hallowe'en is a week from Thursday, so over the next week and a half I am going to post three or four costume ideas.
Today, I am going to do the classic television show/Beatles knock-off band The Monkees. The Monkees look is easy to attain for both men and women. They wore collared shirts, trousers (rarely jeans, except Mike, and boots). I am proud to admit that as a teenager I was obsessed and replicated the look daily. I even made a Nesmith hat, or Nezhat, and wore it every day for about six months (and two of those were part of a very hot summer).

You see the side part on their hair? The hair is long (ish), straight, and smooth, with bangs.
For a Mike costume you would want to add the hat. The Nesmith Hat. See the one in the picture above? It is a wool hat with matching pom. That is all. Typically they are in green, but they can, really, be any color. I have seen him wear red, blue, black, white, and grey. Plop the hat on top of the bob and you have the start of your costume.
Later on Micky (second from right) sported an afro, which is also an option for variation.
For a Mike (left) look you would wear a bright color with a short psychedelic tie that goes with (but not necessarily matches) your pants. And don't forget the hat!
For a Peter look (center) you would wear a tunic shirt (very hippie) with several strands of love beads instead of a tie.
For a Micky (not pictured) and Davy (right) look wear a double breasted shirt (first picture) in a solid color (red, blue, or black preferably), or a button up shirt with a loud pattern. These two would sometimes wear some love beads, but not as much Peter.
Later on for Micky, he took to wearing a tablecloth as a poncho:

Note the afro and the poncho

For a Mike costume you could wear corduroy or jeans (he is from Texas); notice the subtle pin stripe in his pants.
For Peter, wear grey, brown, or tan trousers (a good neutral). They can be corduroy, but not denim. Lastly, buckle your belt to the side. Peter did this to be different.
Micky and Davy, again, are similar in costume. Wear neutral trousers, not corduroy or denim. Buckle the belt in the center. Micky sometimes wore louder pants, but as a rule he stuck to neutrals.
For a female variation I wore high waisted skirts with a slight A-line or a loose pencil skirt. I paired these with a thick belt like the ones in the picture.
In general they wore a Beatle-boot. See above picture. The boot has a slight heel (one inch or so), a slightly pointed toe, and came up a little above the ankle. For a female variation I wore three inch heeled booties that laced up the front
However, Peter took to wearing moccasins later on the more he became involved in the hippie movement. One warning, though, if you do Peter's complete look you might get mistaken for a hippie, not a Monkee.

This is me when I was a teenager, and did a Mike photo shoot with my sister.
Hopefully you can find a good costume!
Today, I am going to do the classic television show/Beatles knock-off band The Monkees. The Monkees look is easy to attain for both men and women. They wore collared shirts, trousers (rarely jeans, except Mike, and boots). I am proud to admit that as a teenager I was obsessed and replicated the look daily. I even made a Nesmith hat, or Nezhat, and wore it every day for about six months (and two of those were part of a very hot summer).
Step 1:
The first step to get a Monkees look is the hair. They had the classic Beatle-bob cut:You see the side part on their hair? The hair is long (ish), straight, and smooth, with bangs.
For a Mike costume you would want to add the hat. The Nesmith Hat. See the one in the picture above? It is a wool hat with matching pom. That is all. Typically they are in green, but they can, really, be any color. I have seen him wear red, blue, black, white, and grey. Plop the hat on top of the bob and you have the start of your costume.
Later on Micky (second from right) sported an afro, which is also an option for variation.
Step 2:
The next step is the shirt. Sometimes in the show they would wear suits, but in general the look was a double breasted shirt, or a shirt with a loud print, as you can see above.For a Mike (left) look you would wear a bright color with a short psychedelic tie that goes with (but not necessarily matches) your pants. And don't forget the hat!
For a Peter look (center) you would wear a tunic shirt (very hippie) with several strands of love beads instead of a tie.
For a Micky (not pictured) and Davy (right) look wear a double breasted shirt (first picture) in a solid color (red, blue, or black preferably), or a button up shirt with a loud pattern. These two would sometimes wear some love beads, but not as much Peter.
Later on for Micky, he took to wearing a tablecloth as a poncho:
Note the afro and the poncho
Step 3:
The second to last step for the Monkees costume is pants along with a belt:For a Mike costume you could wear corduroy or jeans (he is from Texas); notice the subtle pin stripe in his pants.
For Peter, wear grey, brown, or tan trousers (a good neutral). They can be corduroy, but not denim. Lastly, buckle your belt to the side. Peter did this to be different.
Micky and Davy, again, are similar in costume. Wear neutral trousers, not corduroy or denim. Buckle the belt in the center. Micky sometimes wore louder pants, but as a rule he stuck to neutrals.
For a female variation I wore high waisted skirts with a slight A-line or a loose pencil skirt. I paired these with a thick belt like the ones in the picture.
Step 4:
The last step for a Monkees costume is the boots and shoes.In general they wore a Beatle-boot. See above picture. The boot has a slight heel (one inch or so), a slightly pointed toe, and came up a little above the ankle. For a female variation I wore three inch heeled booties that laced up the front
However, Peter took to wearing moccasins later on the more he became involved in the hippie movement. One warning, though, if you do Peter's complete look you might get mistaken for a hippie, not a Monkee.

This is me when I was a teenager, and did a Mike photo shoot with my sister.
Hopefully you can find a good costume!
Sunday, October 20, 2013
Vintage Necessities: Casual/Business wear; the Pencil Skirt and Wiggle Dress
The reason this is casual/business wear is because pencil skirts and wiggle dresses can be worn to the office (and were a la Joan Harris), but can be worn around the house or on a casual day out.
The forties pencil skirt is longer, and slightly looser. It is shaped like the woman's body, but there may be a little room to pinch. This is a 40's pattern (and it has pockets!):
The 50's/60's pencil skirt is much tighter, no room to pinch, no room for pockets. The basic shape was the same (the waist band fit the waist, and the skirt skimmed over the hips and legs):
When you pair a pencil skirt with a sweater or cotton blouse it is vintage casual. When you pair it with a structured shirt or silk blouse, and blazer, you can have a perfect outfit for vintage business. However, with the blazer, it must be fitted to the waist and cropped for a vintage look.
If the wiggle dress is cotton or nylon the dress can be casual enough for day wear. They typically do not need a belt, because they should fit you at your waist, but you can add a belt, a neck scarf, brooch, and a pair of kitten heels and make it business chic.
Note: both the pencil skirt and the wiggle dress can be in a satin/velvet/silk fabric making them viable options for cocktail wear.
The Pencil Skirt:
Pencil skirts are a timeless piece. They have been around for a very long time. The vintage look is up to the waist, and slightly cinched. They hug curves and are very sexy.The forties pencil skirt is longer, and slightly looser. It is shaped like the woman's body, but there may be a little room to pinch. This is a 40's pattern (and it has pockets!):
When you pair a pencil skirt with a sweater or cotton blouse it is vintage casual. When you pair it with a structured shirt or silk blouse, and blazer, you can have a perfect outfit for vintage business. However, with the blazer, it must be fitted to the waist and cropped for a vintage look.
Wiggle Dress:
Wiggle dresses are my favorite. The are form fitting dresses that debuted in the 50's. They are so named because they are so tight that they cause you to wiggle when you walk. Joan Holloway wears this all the time.If the wiggle dress is cotton or nylon the dress can be casual enough for day wear. They typically do not need a belt, because they should fit you at your waist, but you can add a belt, a neck scarf, brooch, and a pair of kitten heels and make it business chic.
Note: both the pencil skirt and the wiggle dress can be in a satin/velvet/silk fabric making them viable options for cocktail wear.
Subscribe to:
Comments (Atom)
